This post is long due since I’ve built this shield almost half a year ago and works great :)
So here is the story of how it all came about.
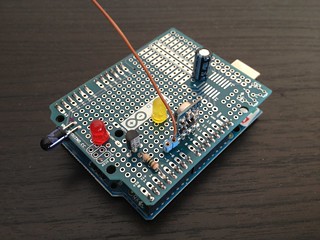
Having too many remote controls around (TV, STB, Home Cinema, PS3, PowerSwitches) I decided to get ride of them all and use only my laptop/smartphone. Using an Arduino I developed a shield that works as an universal IR remote control and as an RF remote control (315Mhz). So here are the instructions:
- Arduino
- Arduino Prototype shield (you can use a breadboard too)
- RF Link Transmitter - 315MHz
- IR EMITTER, 940NM
- Transistor (BC547)
- 100 uF Capacitor
- 15 ohm resistor
- wire
- 1 color LED (optional)
The schematic pretty much explains how everything should be connected:
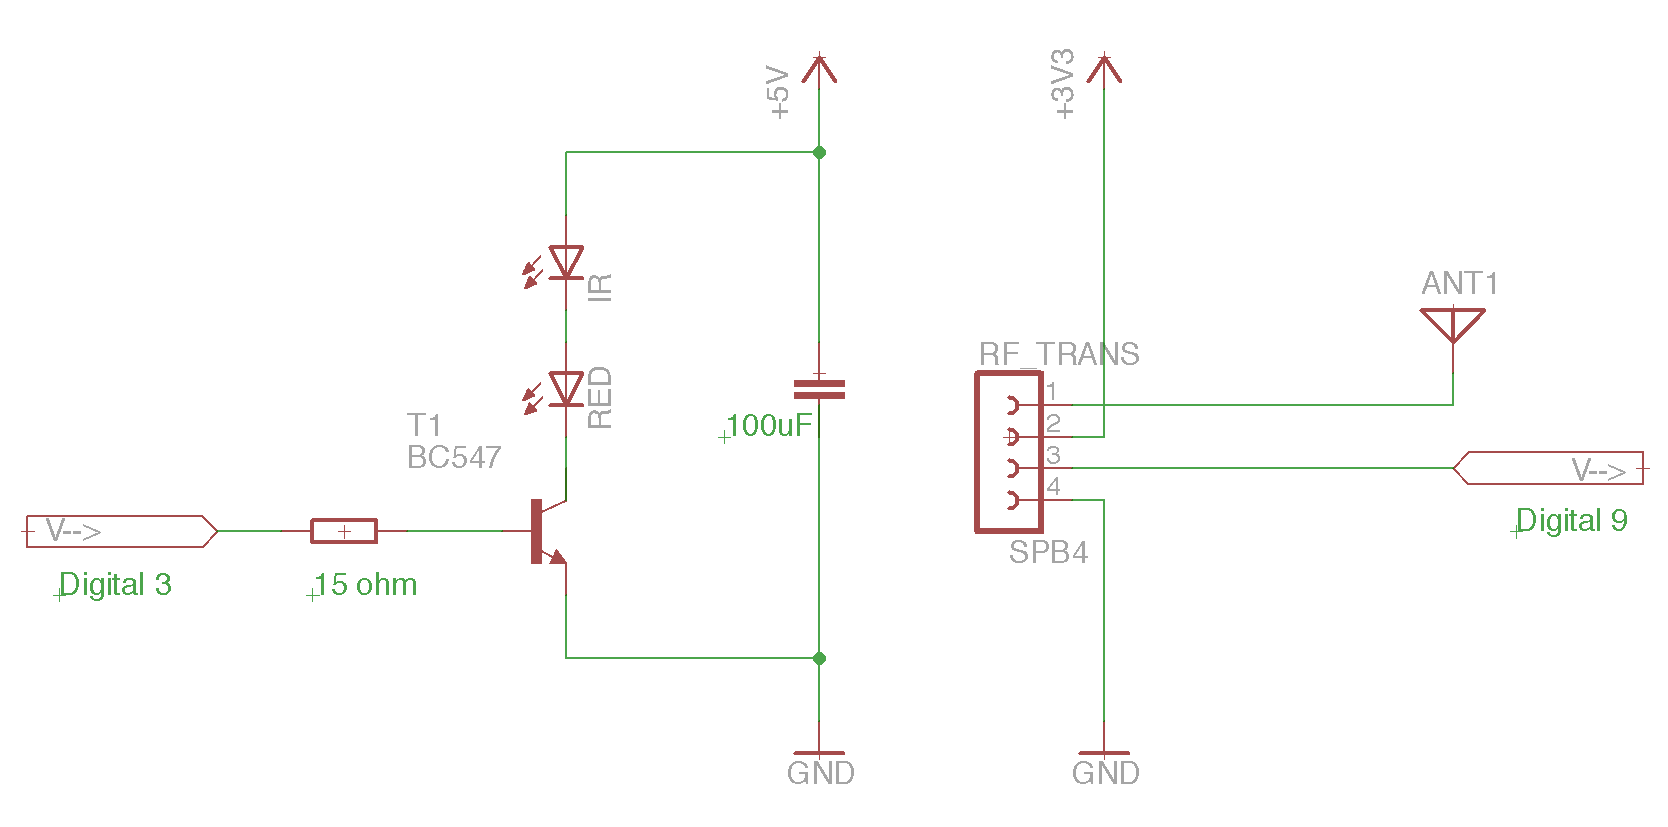
Having everything setup, we now need to program the Arduino. There were here two options: to control directly the Arduino using a network shield, or connect the Arduino to my already existing linux server. Well I opted for the second option since it saved me from buying a network shield and the server was already placed in a good position to target all the devices (this is important, all devices need to be in range of the Arduino shield).
The code is on Github
This code enables me to send through the serial port a string with the desired command encoded in the following way:
L00000000

L - Letter indicating the device protocol
            (S = Sony IR, Z = RC5 IR, R = Chacon RF)
00000000 - Hex encoded code
Example: codes for my SONY TV (attention there are several SONY protocols)
power: S00000a90
1: S00000010
2: S00000810
3: S00000410
4: S00000c10
5: S00000210
6: S00000a10
7: S00000610
8: S00000e10
9: S00000110
0: S00000010
source: S000002f0
AV: S00000a50
vol+: S00000490
P+: S00000090
vol-: S00000c90
P-: S00000890
The question now is: how to get these codes?
You will need to either built an IR receiver or get them from existing libraries such as LIRC, and surely read through Ken Shirriff’s blog and Github project
As for the RF, my recommendation is that you buy an RF receiver and use the example code in fuzzillogic/433MHzForArduino - ShowReceivedCode
At this stage you should already be able to control all your devices directly through your serial port. Next step is now to network your Arduino.
I decided to connect my Arduino to my linux server (an Iomega iconnect ) since it had enough usb ports to connect an extra device and most importantly it was already connected to my home network. Next I installed ser2net through Debian apt-get util and configured /etc/ser2net.conf.
2000:telnet:600:/dev/ttyUSB0:9600 8DATABITS NONE 1STOPBIT bannernow it is just a matter of sending the proper command string through a TCP socket, which can be done even from the command line using netcat:
echo -e "S00000a90" | nc 192.168.1.1 2000In the end, I’m able to connect any device using the RF transmitter and some very inexpensive switches from AKI in addition to a wonderful universal IR remote control.
Hope you enjoy your new remote :)